
SKIRTING BOARDS: HOW TO IMPROVE WITHOUT REPLACING (PART 2)
If you remove existing flooring to reveal original floorboards you probably create an ugly gap between the base of the skirting boards and the floor.
Here is a technique that I have used on a few projects to remedy the problem without replacing all the skirting boards.
The advantages of this technique are a few: it saves from having to remove old ones, it is effective, and it is fast.
Below is what is we started from after removing the existing carpets and underlay.
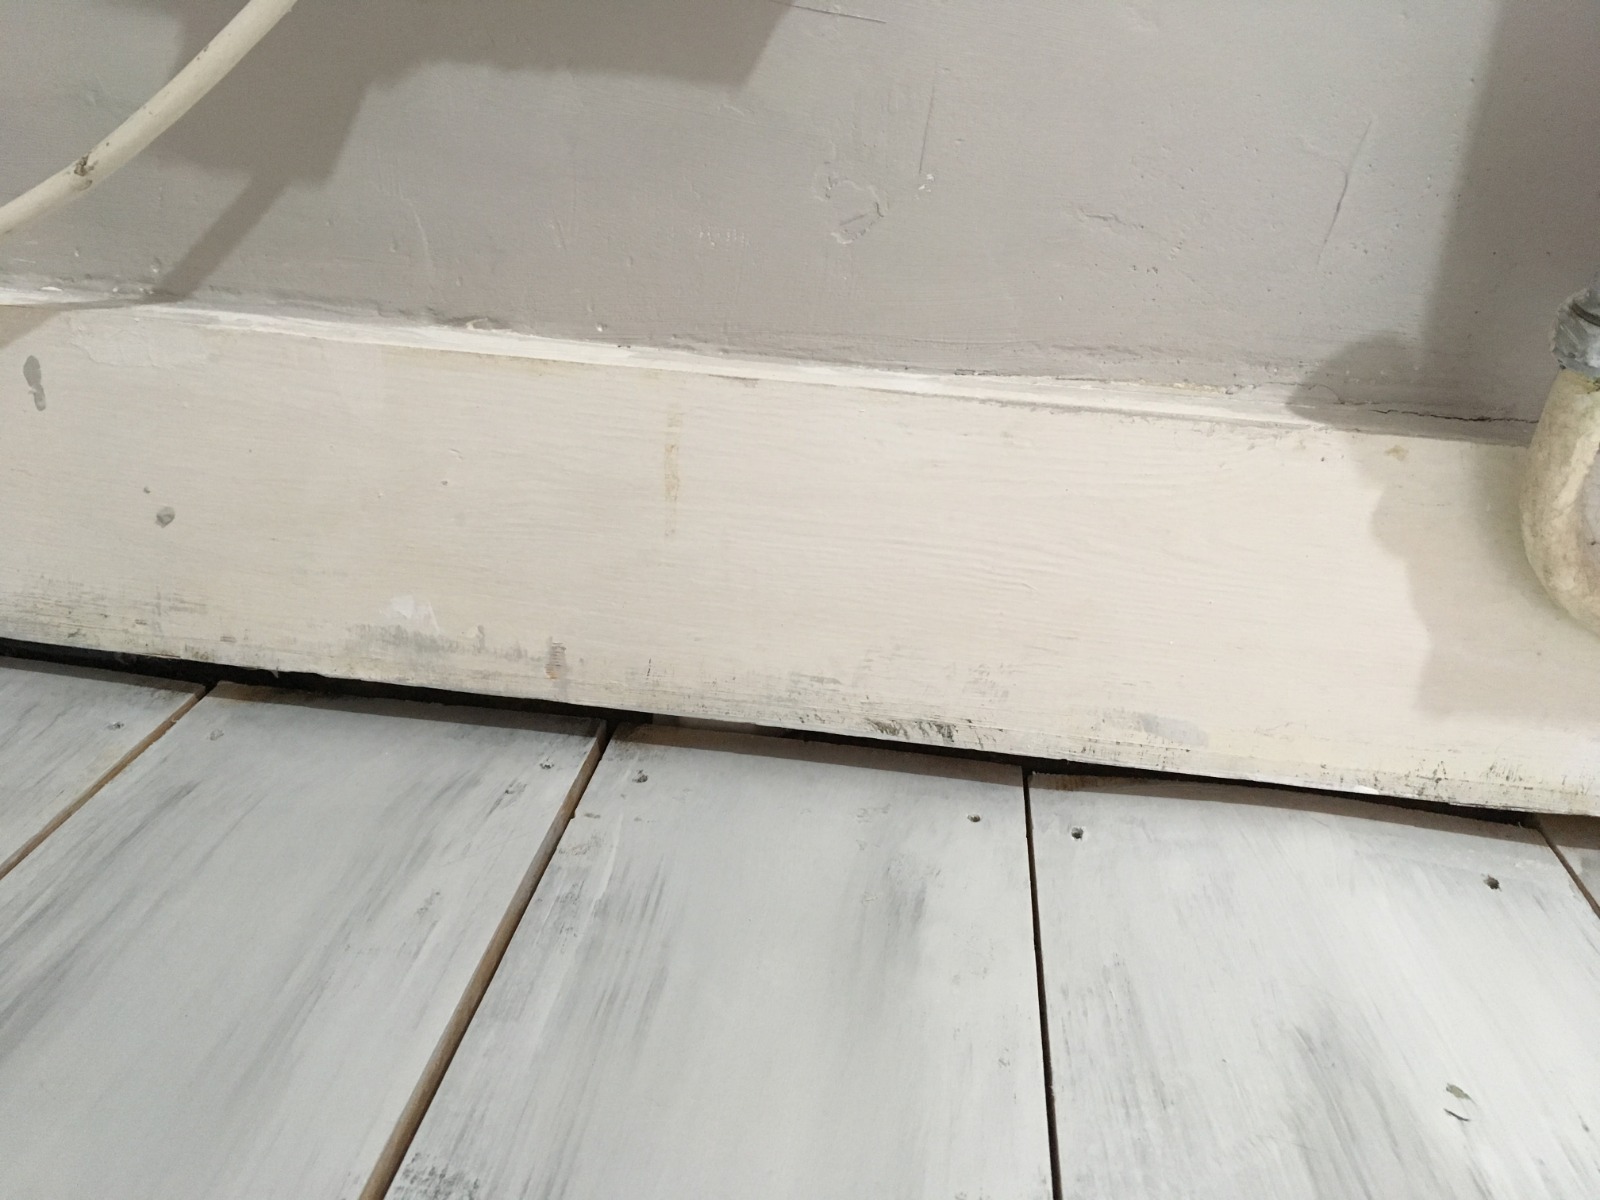

The gap between the base of the board and floor is about 12mm. It is rather unsightly, and the boards need mending and painting.
The aim is to close that gap while creating something similar to a ‘ready-made’ skirting board profile. We achieve that by adding some wood trims of two different shapes and sizes, which can be purchase at any local building merchant or DIY store.
You will need to purchase two different types of wood trims: the first one needs to be flat and tall and have a slanted or round edge - this trim will be forming the ‘base’ part of the profile; the other one is preferably a half round which ideally is as deep as the other trim (though this also works if it is slightly shallower).

If you are someone who struggles to visualise, take a piece of existing board with you if you can, or any piece of wood of similar size as the height of the existing board. This is because the trims to be added need to work in terms of proportions (in width as well as in depth).
The trims will be added to the existing skirtings by using wood glue and pin nails (better a nail gun).

The ‘base’ fills the gap between boards and floors.

I suggest you start with the bottom piece as this will dictate the distance of the top piece (i.e. you cannot change where the floor is but you can leave a smaller or bigger ‘gap’ at top of the existing board).

The top trim is fixed in between the bottom trim and the top of the existing board.

Also, take care to cut the inner and outer corners at 45 degrees with a miter saw.
Once you have assembled your pieces you should have something that looks like the picture below: with a much cleaner line meeting the floor and a smaller gap between skirting board and floor than the one you started off with.

Next, you will have to use filler to make each joint shameless. And to fill any other gaps or imperfections if any present. I suggest to fill and sand the whole lot, then give it a coat of primer. Generally, this process reveals more imperfections than what can be seen prior to priming.
Once it is all smooth and dry make sure you prep for painting by dusting well: hoover first then use a lint-free cloth slightly damp.
For painting woodwork, I recommend using Intelligent Eggshell by Little Greene. It is water based, has good coverage, flows like a dream and it has a slight sheen that looks rather elegant - unlike the oil-based paints which are too shiny and look quite thick.
Here is the final result.
I hope this article has helped you look into problems with a different eye. I do love coming up with custom solutions for different spaces. Obviously, this technique will work In some cases and will not in other cases. Should you find that you cannot use it for some reason please do get in touch and I will do my best to help you find a solution that creatively solves your current challenge.

I look forward to hearing from you.